Achieving great vocal results by fine-tuning the EQ, Compressor, Reverb, and IR functions in the FlashTrack DSP microphone.
Apr 12, 2024


As a mixing engineer, seeing EQ, Compressor, IR, and Reverb on a microphone feels both familiar and exciting. It's exciting because for most beginners who want to do covers, these parameters are likely unfamiliar.
You may have heard many demo files and read product introductions on Cloudvocal's official website, which may have given you some idea of its functions. Allow me to provide you with a more detailed explanation.
- EQ: This parameter adjusts the brightness, thickness, and warmth of your vocals. You've probably heard sounds sharps like boiling water, that's too much of high frequencies leaded.
- Compressor: This parameter adjusts the dynamics of your vocals. Think about the songs you hear – do the singer's vocals fluctuate drastically in volume? Compression helps manage that.
- Reverb: Reverb creates spatial depth in your vocals. It just like singing in a bathroom or a cave – that's the kind of feeling you get with reverb, commonly known as "echo".
- IR: Cloudvocal using computational methods to simulate the sound of condenser, ribbon, and dynamic microphones. Different microphones have different sounds, like those used by singers or gamers.
My favorite preset is
- EQ: Clear
- Compressor: Sing+

But if the article were to end here, it would be somewhat lacking. Let's create our own preset together!

For EQ, frequencies such as 100Hz, 375Hz, 750Hz, 1750Hz, 4kHz, and 8kHz are typically adjusted. Frequencies below 100Hz are usually not necessary for vocals as they are related to bass, guitars, and drums in music. However, if you cut too much, the vocals may sound thin. Be mindful of that.

1750Hz is the mid-frequency of vocals, which can be boosted to enhance presence in the mix. 4kHz and 8kHz are frequencies for brightness in vocals, but don't overdo it.
We can start with a 4:1 ratio, but if you prefer a more natural dynamic range, you can reduce the ratio to 2:1. Personally, I prefer the sound quality of 4:1.
The threshold serves as the starting point for compressor action. Typically, we don't compress too much during recording (usually within 6dB). However, since you can't see how much compression is applied on Flashtrack, use your intuition. The idea is to feel that the compression has been triggered when the sound feels slightly attenuated in the louder parts.
When setting the compressor yourself, I think the most important parameters are Attack Time and Release Time. Although a fast attack can make the loudness smoother, we still want to slow it down a bit so that each syllable of our singing can pass through first. 20ms or 30ms are good starting points.

Release Time is also worth paying attention to. Generally, a fast release time can release the compressor immediately, but if set too fast, it may cause distortion. Therefore, adjust it according to the song. Feel whether your voice blends into the music.

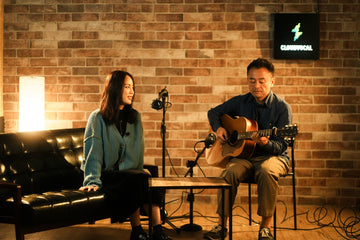
For Reverb, you can see that I selected Plate and Room in the video. For vocals, you don't need too much, just enough to create a sense of space. When adjusting, listen to how much spatial depth and echo you need.

Regarding IR, I think the default factory condenser sounds great. You can choose your favorite tone, but remember not to adjust it at the end like in the video (I knew I liked the condenser sound the most). It's better to select the microphone type first and then add EQ for more accurate adjustment.
By now, you should have a deeper understanding of using vocals in FlashTrack, as well as some concepts of these seemingly complex music production terms. If you already own FlashTrack, you can use my method as a reference, it's a great starting point.
About the author and his Music Production Course

Shawn, the author of this article is the head of Music Production Course. Music Production Course, a Taiwanese online music production teaching brand, provides knowledge in arranging, scoring, recording, mixing, mastering, etc. Currently, its community and courses have influenced over 10,000 Chinese speakers. Its mission is to provide systematic progress resources for anyone making music at home, achieving more beautiful music.
Website:https://ourdaysrecords.com/class/
Instagram:https://www.instagram.com/odrclass/